
Crafting brings joy to many people especially me. I always think that I missed my calling and should have gone into Arts. But life and circumstances got in the way and I forgot about my dreams. You probably understand that what we dream to be doing when we are young reverts to the ugly reality of having to mature and make grown-up decisions.
Sometimes life gets too much and if you don’t find relief then your mind will probably start shutting down. For me when I need an outlet I look for do it yourself stuff to do. However, I have really lost my power of imagination and of course, I don’t believe I have any talent to paint on my own, so I have found a way to create art by watching some do it yourself art videos. These could include making my own jewelry, carving eggs or etching glass.
Crafting with me could be profitable!
Now on to carving the eggs. You would need eggs duh!!! LOL You can literally use any kind of egg and virtually any size. From robin eggs to ostrich eggs whatever color they might be. First, you have to blow the egg. No, I do not mean to blow air on it. Blowing an egg means to empty the inside so you are left with the shell intact.
Blowing your eggs
To start, you need to wash and dry an egg. Then take a large needle to make a hole on either end of the egg. Do not do it on the sides because that will be where most of your design will be. Then use your needle and wiggle it around like you would a drill to make the hole at the bottom of the egg larger.
Most eggs when finished are mounted on a stand on its end so the bigger hole will not be visible anyway. Also, this motion breaks up the yoke making it easier to empty. Then hold the egg over a bowl if you don’t want to make a mess and blow from the other hole to push the insides out. Another way to do this is to take a syringe full of water and push the water in from one of the holes to push the insides out. This will also semi clean the eggs.
Crafting just got more interesting!
If you can draw then you can draw your design right onto the eggshell. But if you are like me and can only draw stick figures then follow these instructions. Trace the image on a thin sheet of paper, like transfer paper. Then glue the design on your egg and let it dry. Once it is dry you can use your Dremel tool or dental drill to carve your pieces out. If you decide to go with a dental drill you will need a compressor to make it work.
Crafting with eggs reality check!
Now you will probably break a few of them in the process especially if you use a Dremel tool. Dremels usually have a lot of vibration and that does not work well with the egg’s fragile shell. Do not get me wrong it is doable, not very efficient, but much more affordable than the drill. Also when you think of your design remember to keep some connecting points so your picture is recognizable. Here is an example of what I am talking about.


Once you have the design on the egg you are ready to carve. Take your Dremel tool and put the appropriate tip on there. Usually, you will start with a very small size bur like the ever-popular #699 and make a tiny hole in the egg to start your carving. Then you have to switch to the blade portion of the bur so you can actually cut into the eggshell. Make sure you do not cut too much out of your egg, because then it will lose its stability and break easier than if you had not.
Cleaning your egg
Once your design is cut you will notice that the membrane of the egg is visible through some of your cuts. There is a way to get rid of all that and make your egg look tidier. If you notice the lines you cut will not be smooth at first. You can leave it as it is or smooth it out with another tip we call the stone tips. They look like sandpaper type tips.
Once you are satisfied with your cuts and design, erase the pencil marks with a cleanser and a soft toothbrush. Once that is done you need to immerse your egg completely in straight bleach solution for about ten to twenty minutes. Make sure you wear gloves while doing this. Roll the egg around so all the insides get covered if not some places will have a shadow when the egg is in the light. For the last step take your egg out of the bleach and gently wash it with soap thoroughly. Let your egg dry for a couple of days so you can then seal it with a sealer. You can mount your egg after this last step.
Crafting: Etching Glass
Ok etching glass is very similar to carving egg, only your design will be on or under the glass. Remember if you put your design under the glass there will be some distortion so make sure you work directly above the design. Also, the bur or tip you use will have to be diamond so that it will actually be able to etch the design onto the glass without wearing out too soon.
Now on to Wire Jewelry!

Let’s start by making our own jewelry. All you really need is simple wire, maybe some beads or not, depending on what you like. Here is an example of what you could make.
The best place I can tell you to go get all your jewelry needs is Master Wire Sculptor. I initially tried to create the intricate jewelry myself, but boy o boy was it hard until I found this incredible site. Mr. Preston Reuther made it look so easy. Anyone with a little time on their hands can follow any of his videos and make the same jewelry I made in the picture above.
You just have to have wire, a couple of small pliers and a rubber mallet. Oh yes, something to make the wire round for a ring or bracelet because believe me when I say you can not make a perfect circle by hand. Now if none of the above suits your fancy you can always keep reading and craft with Tanya or just put everything aside and get your etched glass and pour some delicious FINE WINE and relax.
Crafting with Tanya
Crafting allows you to let loose and relax. At the same time, it will let you get the creative juices flowing and document your life. There are so many people who are benefiting from their talent and at HomeWithTanya.Net you will see and have access to the ever-growing library of Crafting. There are a variety of crafting materials and information such as Planners, Journals, Pocket Letters, Greeting Cards, Stamps, and Cooking.
Come explore the amazing and ever-growing Blog Site, HomeWithTanya.Net here. See where this site can take you and help you brighten someone’s day by easily making a craft that is personalized and from your heart.
Here is an example – and you can have access to so much more when you go to Tanya’s YouTube and Blog Site. It is a steady and constantly growing resource for new things.
Make sure you check out the YouTube Channel for Home With Tanya. You will be able to brighten up your home with some easy and professional crafting items. There are so many great ideas, such as a great Card, or “Pick-Me-Up” Craft Idea. With the digital age, everything fades in time and we lose the link to that memory. But with an actual do it yourself craft, you are making something from the heart and giving something that lasts and leaves a lasting impression. With more than 300 different Videos and Tutorials (and more being added each week) you can not lose.
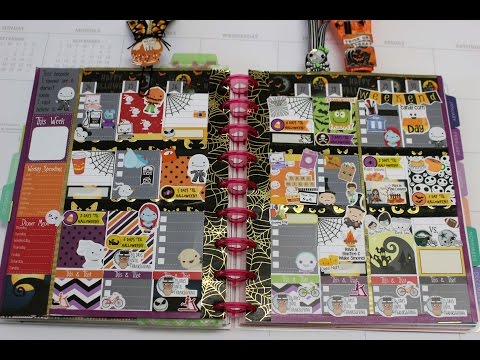
You can get started by just following and working with the techniques and directions Tanya has to offer. Have some fun and enjoy life through crafting. Celebrate your milestones with some added flare of Crafts and Novelties. Find out more about easy and unique hand made cards, gifts. Different methods of bringing cheer to your life and the life of those you care about.
We Need and Want Demonstrators all around the world!
If you are a crafty person, we are looking to add talented people to the team that works together with Tanya and several other Crafters to spread the Love of Crafting with others. Join Tanya to gain knowledge, ideas, and techniques to become a better Crafter. You will be dealing directly with Tanya and her Team of Crafters.